How To Take Headshots With iPhone [Expert Guide]
I think we all know that a professional headshot is an essential part of looking professional online, but the time and money necessary to get headshots done professionally is usually the thing stopping you from pulling the trigger.
Luckily, the camera in your pocket is probably good enough to get the results you’re looking for, you just need the right camera settings and apps to edit the final result.
You can easily capture a professional headshot photo effortlessly with your iPhone, ensuring it reflects your unique personality and style – because who knows your own headshot better than you?
Let’s dive in and explore the ins and outs of mastering iPhone headshots & what you can do to retouch your photos to have them look perfect.
How to Take Headshots with iPhone

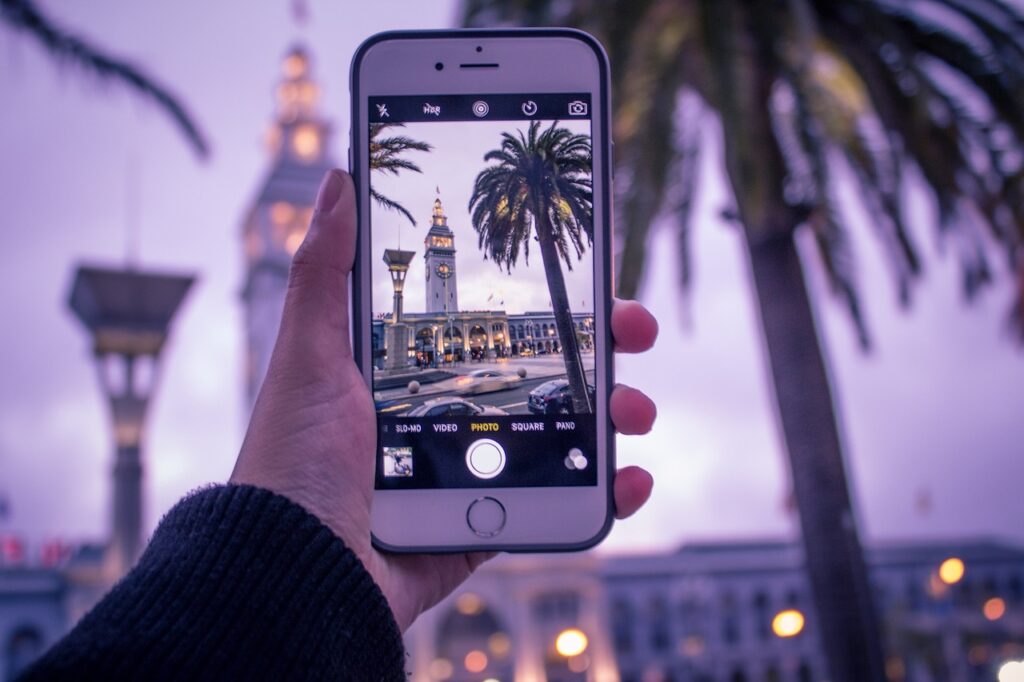
Capturing professional headshots with an iPhone involves leveraging its advanced camera features, particularly Portrait Mode, selecting the right lens, and ensuring optimal lighting conditions.
The depth effect in Portrait Mode simulates the bokeh of DSLRs, while natural lighting during golden hour offers the most flattering illumination.
Remember, while the iPhone is a powerful tool, the final result also depends on the setting, your expression, and post-capture edits.
Also, you need to be a little careful when capturing headshots with your iPhone, ensure not to create harsh shadows, as they can impact the overall photo quality.
Using the iPhone’s Camera
What makes the iPhone’s camera great for headshots?
The iPhone camera system, especially on newer models, has features like ‘Portrait’ mode that creates a depth effect to blur the background and multiple lenses to choose the perfect framing.
These features allow for professional-grade headshots when used correctly.
When armed with the right knowledge, your iPhone can deliver a perfect headshot that rivals even some professional setups.
Exclusive to newer iPhone models, the ‘Portrait’ mode is a game-changer.
With its depth effect, it automatically creates blurred background, ensuring you, the subject, remain the focal point.
This is also the effect that makes professional headshots stand out, it’s called Bokeh, and the iPhone software executes this flawlessly.
Portrait Mode: Your Secret Weapon – The depth effect, known as Bokeh, makes the subject pop by blurring the background, giving your professional photo a unique touch.
Lens Dynamics: Zooming In (or Not) – Always opt for the standard camera lens for iPhone headshot; it’s designed to capture clear and focused facial features.
How to Create the Perfect Lighting with an iPhone
How can you achieve optimal lighting for headshots using an iPhone?
Achieving the best lighting for headshots on an iPhone involves leveraging natural light during the golden hour or utilizing soft, diffused daylight from a window for indoor shots.
Lighting is extremely important in headshots and plays a vital role in a good headshot.
Good lighting enhances the subject’s features and ensures photo clarity.
Dive into the nuances of iPhone lighting:
Embracing Natural Lights – The golden hour, during dawn or dusk, offers soft light that flatters and accentuates facial features.
Timing is everything. The time of day or night that you shoot your photo can be the difference between an awesome headshot, and one that falls flat.
The glow during the golden hour—either dawn or dusk—can be magical. It offers a balanced, soft light that compliments skin tone.
Indoor Works Too – Even without golden hour light, positioning yourself near a large window can offer natural and appealing lighting.
Pro Tip: If you are an indoor person, you can learn how to take headshots at your home with this ProPhotos guide.
Headshot Angles & Orientation

What are the best angles for capturing headshots on an iPhone?
Exploring various angles, like off-center alignment or tilting the phone slightly, can result in dynamic and compelling iPhone headshots.
The goal is to find an angle that complements the subject’s features and ensures a balanced composition.
Remember:
The Ideal Expression – Natural expressions often work best. Forced smiles can look inauthentic, so remain relaxed and let your genuine emotions shine through.
Ditch the rehearsed smiles and aim for a natural, relaxed demeanor.
Straining a fake smile is one of the most common mistakes that people who ‘hate’ how they look in photos are referring to.
Act natural and put your phone on a timer to take the photo.
Looking for other common mistakes to avoid during your headshots? You must read this ProPhotos article.
Editing Headshots: The Final Step
Which apps and tools should you use for editing iPhone headshots?
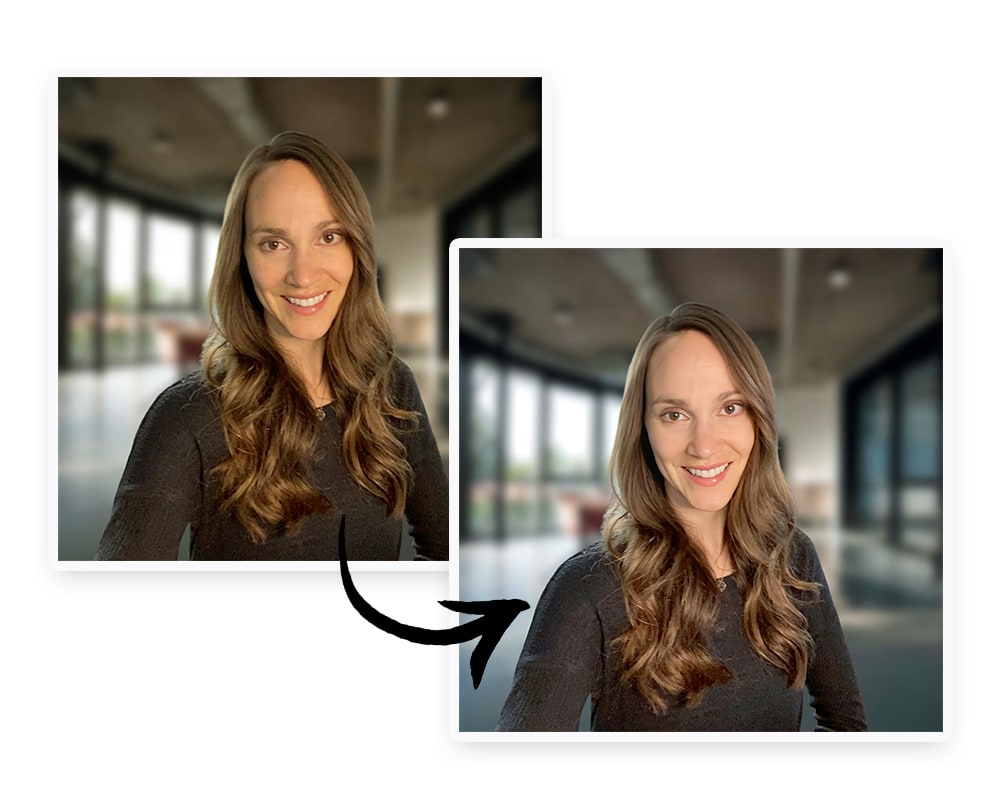
For refining iPhone headshots, use the built-in ‘Photos’ app for basic adjustments like brightness and contrast.
For advanced editing, apps like Pixelcut, VSCO, FaceTune 2, and Prisma provide a range of retouching tools to enhance the photo without overdoing it.
Basic Adjustments – Simple tweaks can make a huge difference. Use the iPhone’s ‘Photos’ app for foundational edits.
Retouching: A Delicate Dance – Enhance the photo, but always prioritize authenticity.
Apps to Download – From background removal with Pixelcut to subtle filters with VSCO, choose the right app for the desired effect, ensuring the final image still looks professional.
Best Headshots Editing Apps For iPhone
Which are the best apps to download for editing and retouching iPhone headshots?
To achieve professional-grade iPhone headshots, consider using Pixelcut for background alterations, VSCO for tasteful filters, FaceTune 2 for facial retouching, and Prisma for unique effects.
While all these apps are powerful, the key is to use them judiciously to retain a natural and professional appearance.
Breaking down the apps’ functionalities:
-
https://www.pixelcut.ai/ is a great app for removing background clutter, changing to and from black & white, and adding a bunch of other
-
VSCO is another tried-and-true app for editing and adding filters. Be careful not to edit or add too many filters, your headshot should be realistic and not an ‘Instagram photo’.
-
FaceTune 2 is also another great photo editing app, this is for retouching your face and getting rid of blemishes, acne, or adding facial filters which can make your face a little more symmetrical.
-
Prisma is another cool tool that you can use, be sure not to go too crazy on the editing as you can get carried away, and then your headshot won’t look professional.
Common Pitfalls & Tips
What are the common mistakes to avoid when taking and editing headshots with an iPhone?
When capturing and editing iPhone headshots, common pitfalls include over-editing, using excessive filters, and adopting an unnatural expression.
The key is to prioritize natural lighting, genuine expressions, and minimalistic editing to achieve a realistic and professional look.
Don’t mess this up:
Over-Editing – It’s easy to get carried away, especially with powerful editing apps. Always refer back to the original photo to ensure you’re not straying too far from authenticity.
Excessive Filters – While filters can enhance a photo, over-reliance can distort colors and facial features. The aim is enhancement, not transformation.